Welcome, fellow coffee lover! If you’re here, chances are you’ve fallen for the creamy, dreamy allure of oat milk in your coffee. You’re not alone. But you’ve probably also discovered it’s not always as simple as a quick pour. Learning How To Brew Coffee With Oat Milk correctly can be the difference between a silky-smooth latte and a curdled, disappointing mess. I’ve been behind the bar for years, and trust me, I’ve seen it all. The good news? Crafting that perfect, café-quality oat milk coffee at home is totally achievable. You just need a few insider tricks, and that’s exactly what I’m here to share. Let’s dive in and turn your kitchen into your favorite new coffee spot.
Why Has Oat Milk Taken Over the Coffee World?
It feels like one day we were all about almond milk, and the next, oat milk was the undisputed champion of the non-dairy world. So, what’s the big deal? It comes down to a few key things that make it a barista’s best friend (and soon to be yours).
Unlike some other plant-based milks, oat milk has a naturally creamy texture and a relatively neutral, slightly sweet flavor that complements coffee instead of overpowering it. Its higher fat and protein content (compared to, say, almond or rice milk) allows it to steam and froth into a beautiful, velvety microfoam that’s perfect for lattes and cappuccinos. It simply behaves more like traditional dairy milk, making the transition seamless for many.
The First Rule: Not All Oat Milks Are Created Equal
This is the most important lesson you will learn today. If you grab just any carton of oat milk from the grocery store shelf, you might be setting yourself up for failure. The secret to success lies in choosing the right kind.
Barista Blends vs. Regular Oat Milk
Have you ever noticed cartons labeled “Barista Edition” or “Barista Blend”? They aren’t just a marketing gimmick. These formulas are specifically designed for coffee.
- Barista Blends: These contain a slightly higher fat content and added stabilizers (like gellan gum or dipotassium phosphate). These ingredients are crucial. They prevent the oat milk from separating or curdling when it hits the hot, acidic coffee and help it create stable, long-lasting foam when steamed.
- Regular Oat Milk: Standard oat milk is fantastic for cereal or smoothies, but it often lacks the necessary ingredients to withstand heat and acidity, leading to that dreaded curdling effect.
“The number one mistake I see people make at home is using the wrong oat milk. Investing in a good barista blend is the single biggest upgrade you can make to your oat milk coffee game. It’s designed to perform under pressure, literally.” – Isabella Martinez, veteran barista and coffee consultant.
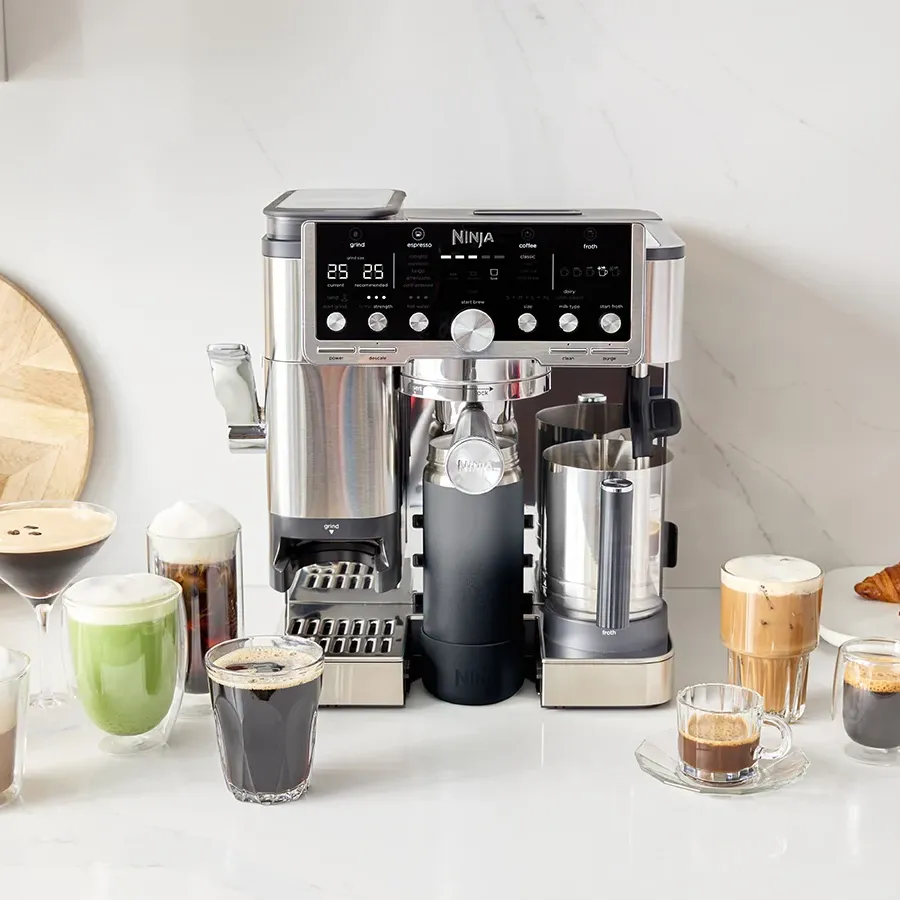
How to Brew Coffee with Oat Milk: The Methods
Alright, you’ve got your barista-grade oat milk. Now for the fun part. The best way to combine it with your coffee depends on the type of drink you’re making.
For Lattes, Cappuccinos, and Flat Whites (Using an Espresso Machine)
This is where oat milk truly shines. Getting that silky microfoam is a skill, but it’s one you can master with a little practice.
- Start Cold: Always, and I mean always, start with cold oat milk straight from the fridge. Pour it into a cold metal steaming pitcher. For a good vortex, fill it to just below where the spout begins.
- Purge the Wand: Before you start, point your steam wand away from you (over the drip tray) and turn it on for a second or two. This clears out any condensed water.
- Position the Wand: Submerge the tip of the steam wand just below the surface of the milk, slightly off-center.
- Aerate the Milk: Turn the steam wand on full power. You should hear a gentle “tearing” or “hissing” sound. This is air being introduced to create foam. Keep the tip near the surface for just a few seconds—only long enough to increase the volume by about 20-30%.
- Create the Vortex: Once you’ve added enough air, submerge the wand deeper into the milk. Angle the pitcher to create a whirlpool or “vortex.” This is critical for breaking down large bubbles into a uniform, silky microfoam.
- Watch the Temperature: Keep one hand on the side of the pitcher. When it becomes too hot to comfortably hold for more than a second (around 140°F or 60°C), it’s done. Don’t overheat it! Overheating will scald the milk and ruin the flavor and texture.
- Tap and Swirl: Turn off the steam, remove the wand, and wipe it immediately. Tap the pitcher on the counter to pop any large bubbles, then give it a good swirl to incorporate the foam and create a glossy, wet-paint-like texture.
- Pour and Enjoy: Pour your perfectly steamed milk into your shot of espresso and enjoy. This is the foundation of learning how to brew coffee with oat milk for espresso-based drinks.
For Drip Coffee, Pour-Over, or French Press
If you’re just adding a splash of oat milk to your black coffee, you still need to be careful to avoid curdling.
- The Problem: The “shock” of cold milk hitting hot, acidic coffee is what causes the proteins to separate.
- The Solution (Tempering): Don’t pour the milk straight from the fridge into your steaming hot coffee. Instead, pour a small amount of hot coffee into your mug of oat milk first, stir it to gently raise its temperature, and then pour that mixture back into the rest of your coffee. Or, simply let your coffee cool for a minute before adding the milk.
For Iced Coffee Lovers
This is the easiest method of all! Since there’s no heat involved, curdling is not an issue.
- Simply pour your chilled coffee or cold brew over ice.
- Top it off with your favorite oat milk (even a regular blend works fine here).
- Stir and enjoy the creamy goodness.
Troubleshooting Common Oat Milk Problems
Even the pros run into issues sometimes. Here are answers to the most common frustrations.
Why is my oat milk curdling?
This is almost always due to one of two things: acidity or temperature shock. Coffee is acidic. When cold oat milk hits hot coffee, the proteins can seize up and separate. To fix this, you can:
- Use a barista-blend oat milk with stabilizers.
- Try a coffee with lower acidity, like a dark roast or beans from Brazil or Sumatra.
- Let your coffee cool for a minute before adding the milk.
Why won’t my oat milk froth?
If you’re struggling to get a good foam, check these things:
- Are you using a barista blend? Regular oat milk doesn’t have enough fat and protein to create stable foam.
- Is your milk cold enough? Warm milk will not foam properly. It needs to be straight from the fridge.
- Are you overheating it? Steaming past 150°F (65°C) will cause the foam to collapse.
Frequently Asked Questions (FAQ)
Q: What is the best brand of oat milk for coffee?
A: Brands like Oatly Barista Edition, Califia Farms Barista Blend, and Minor Figures are consistently ranked as favorites among professional baristas for their excellent steaming capabilities and balanced flavor. Experiment to find the one you love most!
Q: Can I froth oat milk without an espresso machine’s steam wand?
A: Absolutely! A handheld milk frother is an inexpensive and effective tool. You can also use a French press by pumping the plunger up and down in warmed oat milk (don’t boil it!) until it becomes frothy.
Q: Why does my oat milk latte taste bitter?
A: This is likely due to either over-extracted espresso or scorched milk. Make sure your espresso shot is dialed in correctly and avoid steaming your oat milk past 140-145°F (60-63°C), as higher temperatures can create a burnt, bitter taste.
Q: Is it okay to use oat milk that has separated in the carton?
A: Yes, separation is natural for many plant-based milks. Just give the carton a very vigorous shake before you use it to recombine everything.
Q: Can I make my own barista-style oat milk at home?
A: While you can make delicious homemade oat milk, replicating the stability and frothing power of commercial barista blends is very difficult without access to specific emulsifiers and stabilizers. For the best lattes, it’s usually worth buying a pre-made barista blend.
Your Perfect Oat Milk Coffee Awaits
Mastering how to brew coffee with oat milk is a journey, not a destination. It’s about understanding the simple science behind the ingredients and techniques. By choosing the right milk, respecting the temperature, and practicing your method, you unlock a world of incredibly delicious, creamy, and satisfying coffee drinks right in your own home. So go ahead, grab that barista blend, and start experimenting. Your perfect morning cup is waiting for you.