Welcome, fellow coffee lover! So, you’re dreaming of that perfect, cloud-like cappuccino, the kind you pay a pretty penny for at your local café. You’re wondering How To Make Cappuccino Coffee Maker magic happen right in your own kitchen. Well, you’ve come to the right place. I’m here to demystify the whole process, turn you from a coffee drinker into a home barista, and show you that crafting a beautiful cappuccino isn’t rocket science—it’s an art you can absolutely master. Forget the morning rush to the coffee shop; your new favorite spot is about to be your own counter. Let’s dive in and unlock the secrets to that perfect cup.
What Exactly is a “Cappuccino Coffee Maker”?
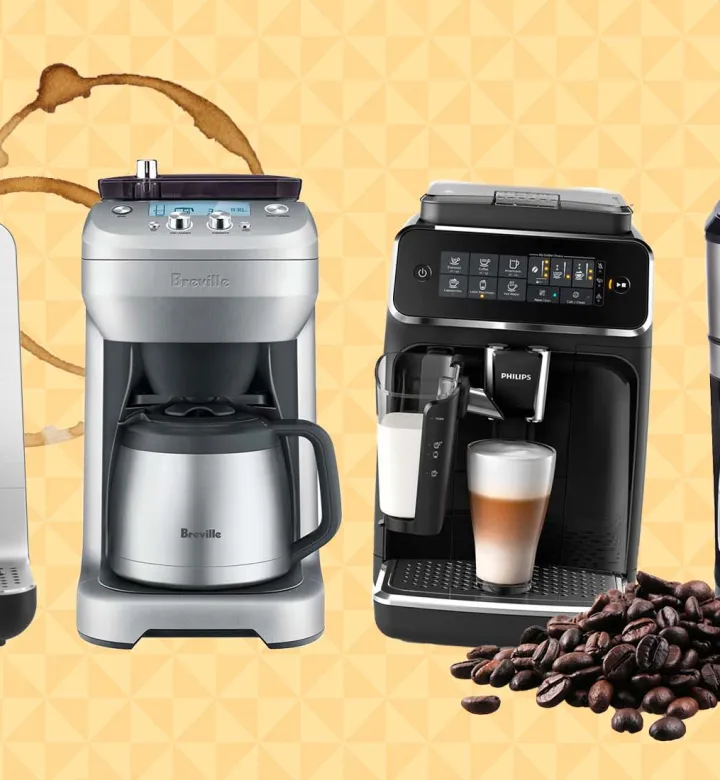
First things first, let’s clear up a common point of confusion. When people search for a “cappuccino coffee maker,” they’re almost always talking about an espresso machine with a steam wand. A standard drip coffee maker, the kind that brews a big pot of black coffee, simply can’t do the job.
Why? Because a true cappuccino is built on two fundamental pillars:
- A shot of rich, concentrated espresso. This requires a machine that can force hot water through finely-ground coffee at high pressure (typically 9 bars or more).
- Velvety, steamed milk foam (microfoam). This requires a steam wand to inject hot steam into milk, simultaneously heating and texturing it into that glorious, silky foam.
So, when we talk about how to make cappuccino coffee maker style, we’re talking about using an espresso machine. It’s the hero of our story.
The Essential Gear You’ll Need
Before we start brewing, let’s get our tools in order. Having the right equipment makes all the difference between a frustrating mess and a flawless cappuccino.
- An Espresso Machine: The star of the show. This can range from a beginner-friendly semi-automatic to a fully automated machine.
- A Quality Coffee Grinder: This is non-negotiable. Freshly ground beans are the soul of good espresso. A burr grinder is highly recommended for a consistent grind.
- Fresh Espresso Beans: Look for a medium to dark roast labeled for espresso. The beans should have been roasted within the last few weeks for optimal flavor.
- Cold Milk: Whole milk is the easiest to froth and creates the richest, creamiest foam. Oat milk is a fantastic dairy-free alternative.
- A Milk Frothing Pitcher: A stainless steel pitcher is essential for controlling the temperature and creating silky microfoam.
- A Tamper: This tool is used to compress the coffee grounds evenly in the portafilter. Many machines come with one.
- A Scale (Optional, but recommended): For precision, weighing your coffee grounds and your final espresso shot can elevate your consistency.
- Your Favorite Mug: A classic 6-8 oz (180-240 ml) ceramic cup is the traditional choice.
How to Make Cappuccino with a Coffee Maker: The Step-by-Step Guide
Alright, your station is prepped, and you’re ready to go. We’re going to follow the classic cappuccino ratio: 1/3 espresso, 1/3 steamed milk, and 1/3 foam. Let’s break it down.
- Prep Your Station and Machine
Turn on your espresso machine and let it heat up fully. This can take anywhere from 5 to 25 minutes depending on the model. Run a “blank shot” (just hot water) through the group head and into your cup to preheat everything. A warm cup keeps your cappuccino hotter for longer. - Grind Your Beans
Measure out your coffee beans (typically 18-20 grams for a double shot) and grind them to a fine consistency, something like table salt or slightly finer. This step is crucial; if the grind is too coarse, your espresso will be weak and watery. Too fine, and it will be bitter and over-extracted. - Dose and Tamp
Place your freshly ground coffee into the portafilter (the handle with a basket). Distribute the grounds evenly and then use your tamper to press down firmly and levelly. You’re aiming for about 30 pounds of pressure. Think of it as the pressure you’d use to press a stubborn doorbell. A level, even tamp is key for an even extraction. - Pull the Espresso Shot
Lock the portafilter into the group head of your machine. Place your preheated cup underneath and start the extraction immediately. For a classic double shot, you’re aiming for about 40 grams (or 2 fl oz) of espresso in about 25-30 seconds. The stream should look like warm honey pouring from the spouts. - Steam the Milk
This is where the real magic happens, and it’s the part that takes the most practice. Don’t worry, you’ll get the hang of it!Step 5.1: The Stretch (Aerating)
Pour cold milk into your frothing pitcher, up to just below the base of the spout. Submerge the tip of the steam wand just below the surface of the milk and turn the steam on full power. You should hear a gentle “tsss-tsss” sound, like paper tearing. This is air being introduced into the milk, creating foam. Keep the tip near the surface until the milk has expanded by about 30-50% and the pitcher feels lukewarm to the touch.
Step 5.2: The Swirl (Texturing)
Now, plunge the steam wand deeper into the milk, positioning it off-center to create a whirlpool or vortex. This vortex breaks down large bubbles and integrates the air, creating a silky, glossy microfoam instead of a bubbly, stiff foam. Continue heating the milk until the pitcher is hot to the touch, but not so hot that you can’t hold it for a second or two (around 140-150°F or 60-65°C). Turn off the steam before removing the wand from the milk.
- The Grand Finale: Pouring
Wipe the steam wand clean immediately. Give your milk pitcher a firm tap on the counter to pop any large bubbles and then swirl the milk gently to keep it integrated and glossy. Now, for the pour. Tilt your cup and start pouring the milk into the center of the espresso. Once the cup is about halfway full, level it out and bring the pitcher closer to create a nice white cap of foam. And there you have it—a beautiful, homemade cappuccino.
As my friend Isabella Rossi, a competition-winning barista from Milan, always says, “The espresso is the heart of the cappuccino, but the milk is its soul. Don’t rush the steam. Listen to the milk, feel the pitcher, and you’ll learn its language.”
Choosing the Right Machine for Your Cappuccino Journey
Feeling inspired? If you’re in the market for a machine, the options can be dizzying. Here’s a quick breakdown to help you understand how to make cappuccino coffee maker selection a breeze.
| Machine Type | Best For | Pros | Cons |
|---|---|---|---|
| Semi-Automatic | The Enthusiast | Full control over the brewing process; high-quality results; rewarding. | Steep learning curve; requires a separate grinder. |
| Super-Automatic | The Convenience Seeker | Bean-to-cup at the press of a button; consistent; no skill required. | Less control; more expensive; can be harder to clean. |
| Pod Machines | The Ultimate Minimalist | Extremely easy and clean; very fast; small footprint. | Limited coffee choice; generates waste; lower quality espresso. |
When choosing, consider your budget, counter space, and how much time and effort you want to put into your morning coffee ritual.
|
Our Picks for the Best Coffee Maker in 2026
As an Amazon Associate, we earn from qualifying purchases.
|
||
| Num | Product | Action |
|---|---|---|
| 1 | Amazon Basics Coffee Makers, 12-Cup Coffee Machines with Reusable Filter, Coffee Pots, Black & Stainless Steel |

|
| 2 | BLACK+DECKER 12-Cup Coffee Maker with Easy On/Off Switch, Easy Pour, Non-Drip Carafe with Removable Filter Basket, Vortex Technology, Black |
|
| 3 | Keurig K-Duo Hot & Iced Single Serve & Carafe Coffee Maker, MultiStream Technology, 72oz Reservoir (Gen 2) |
|
| 4 | Mini Hot and Iced Coffee Maker Single Serve, for K Cup and Ground, 6 to 14 Oz Brew Sizes, with Recipe Book, for Home, Travel, RV, Office and Dorm, Classic Black (2.0 Version) |
|
| 5 | Keurig K-Express Single Serve K-Cup Pod Coffee Maker, 3 Brew Sizes, Strong Button Feature, 42oz Removable Reservoir, Black |
|
| 6 | BLACK+DECKER 12-Cup Digital Coffee Maker, Programmable, Washable Basket Filter, Sneak-A-Cup, Auto Brew, Water Window, Keep Hot Plate, Black |
|
| 7 | Nespresso Vertuo Pop+ Coffee and Espresso Maker by De\'Longhi, Samra Origins by The Weeknd Vertuo Buna Yellow Aeroccino3 milk frother |
|
| 8 | BLACK+DECKER 12-Cup Digital Coffee Maker, Programmable, Washable Basket Filter, Sneak-A-Cup, Auto Brew, Water Window, Keep Hot Plate, Black |
|
| 9 | Mr. Coffee Black Coffee Maker, 12 Cups, with Auto Pause and Glass Carafe, Perfect for Home and Office Use |
|
| 10 | BLACK+DECKER 12-Cup Coffee Maker with Easy On/Off Switch, Easy Pour, Non-Drip Carafe with Removable Filter Basket, Vortex Technology, Black |
|
Common Mistakes to Avoid (And How to Fix Them)
I’ve seen countless beginners struggle with the same few issues. Here are the most common pitfalls on the path to learning how to make cappuccino coffee maker perfection:
- Bitter Espresso: Your grind is likely too fine, you’re using too much coffee, or your extraction time is too long. Try a slightly coarser grind or stop the shot a few seconds earlier.
- Bubbly, Stiff Foam: You introduced too much air at the beginning (the “stretching” phase) or you overheated the milk. Spend less time aerating and more time creating that smooth vortex.
- Watery, Thin Foam: You didn’t introduce enough air. Make sure the steam wand tip is just below the surface at the start to get that “tearing paper” sound.
- Using Old Beans: Stale coffee beans produce a lackluster espresso with very little crema. Always use fresh beans for the best results. It’s the single biggest upgrade you can make.
Frequently Asked Questions (FAQ)
Q: Can I make a cappuccino without an espresso machine?
A: You can make a cappuccino-like drink. You can brew strong coffee with a Moka pot or AeroPress and then froth milk separately using a handheld frother or a French press (by pumping the plunger up and down). However, it won’t have the same texture or taste as a true espresso-based cappuccino.
Q: What is the difference between a latte and a cappuccino?
A: The primary difference is the milk-to-foam ratio. A cappuccino has a thick layer of foam (equal parts espresso, steamed milk, foam). A latte has much more steamed milk and just a thin layer of foam on top, making it a milkier, smoother drink.
Q: What is the best milk for making cappuccino foam?
A: Whole dairy milk is the easiest to work with and produces a creamy, rich foam due to its fat and protein content. For non-dairy options, “barista edition” oat milk is widely considered the best as it’s specifically formulated to steam well.
Q: Why is my milk not frothing?
A: This could be due to several reasons. The milk might not be cold enough (always start with cold milk), you might not be introducing enough air, or the milk itself might be the issue. Ensure your steam wand is clean and has good pressure.
Q: How important is a good coffee grinder?
A: It is critically important. A good burr grinder gives you a consistent grind size, which is essential for a balanced espresso extraction. It’s often said that you should allocate as much of your budget to your grinder as you do to your espresso machine.
Your Journey Starts Now
Mastering how to make cappuccino coffee maker style is a journey, not a destination. It’s about the ritual, the aroma of freshly ground coffee, the sound of the steam wand, and the satisfaction of that first perfect sip. Don’t be discouraged if your first few attempts aren’t perfect. Every cup is a learning experience.
By choosing the right gear and practicing these steps, you’re not just making a drink; you’re creating a moment of affordable luxury for yourself every single day. So go on, embrace your inner barista, and start brewing. Your perfect cappuccino is waiting.